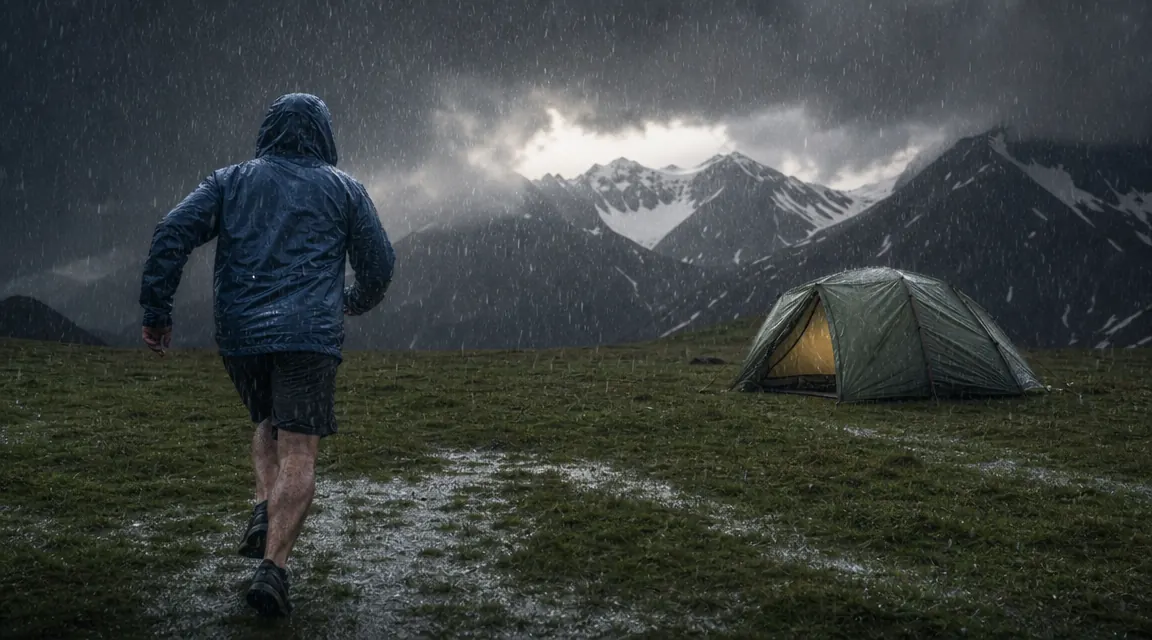
I have been rained on more times than I can count. Rained on while pitching, rained on at 2am when a storm rolled in with no warning, rained on during a trip I had been looking forward to for three months. Here's what I've learned: the people who stay comfortable are not luckier than everyone else. They just made a few decisions before the rain started. Your tent, your campsite, your gear organization, and the way you manage moisture inside the shelter all matter. Get those things right and a rainy night becomes cozy instead of miserable.
This guide walks through the eight things that have consistently kept me dry across dozens of wet weekends. I'll anchor each step to what I actually do, and I'll reference the specific tent I've been using since I rebuilt my kit around lighter, better-designed gear. The Clostnature Lightweight Backpacking Tent has a taped-seam rain fly, a generous vestibule, and a setup you can execute in under four minutes in the rain. If you need a shelter recommendation, that's where I'd point you. But the rest of these steps apply no matter what tent you're using.
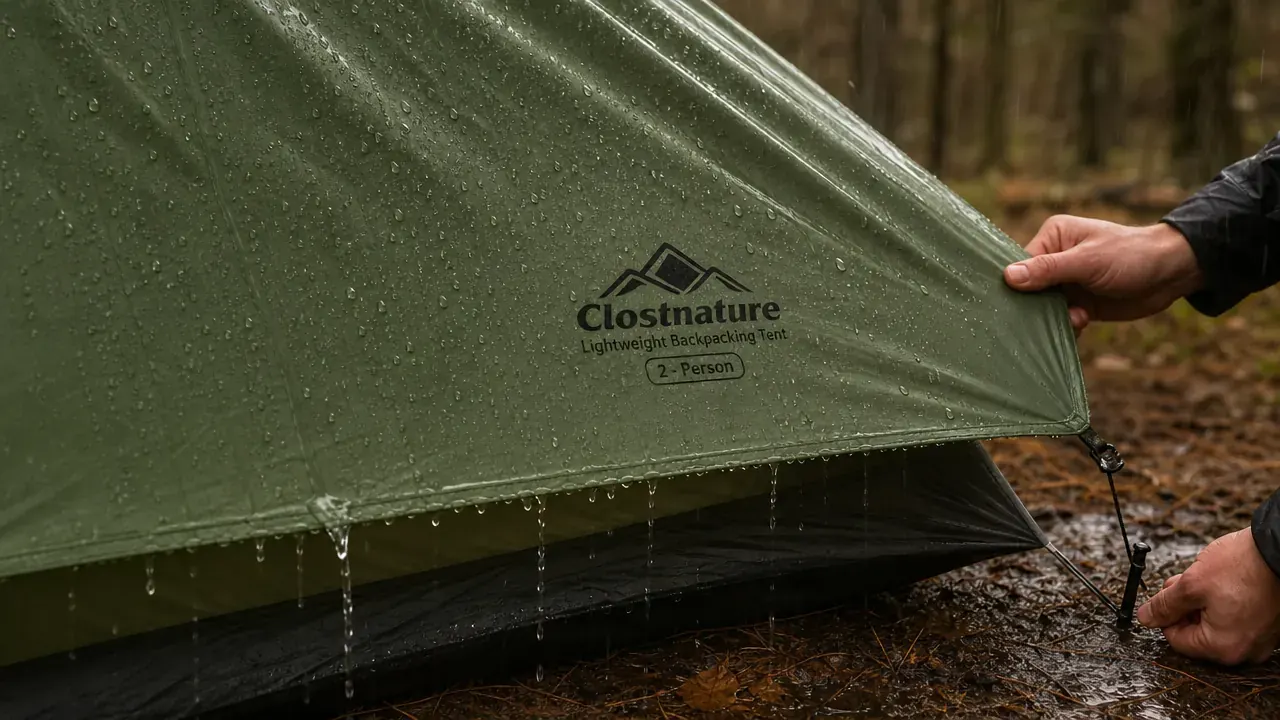
Tent leaking in the rain? This one won't.
The Clostnature Lightweight 2-Person Tent uses a fully taped rain fly rated to handle serious downpours. It's what I use when I need to know the shelter will hold. Check the current price before you head out this weekend.
Amazon Check Today's Price on Amazon →Step 1: Pick a Tent With a Real Rain Fly, Not a Decoration
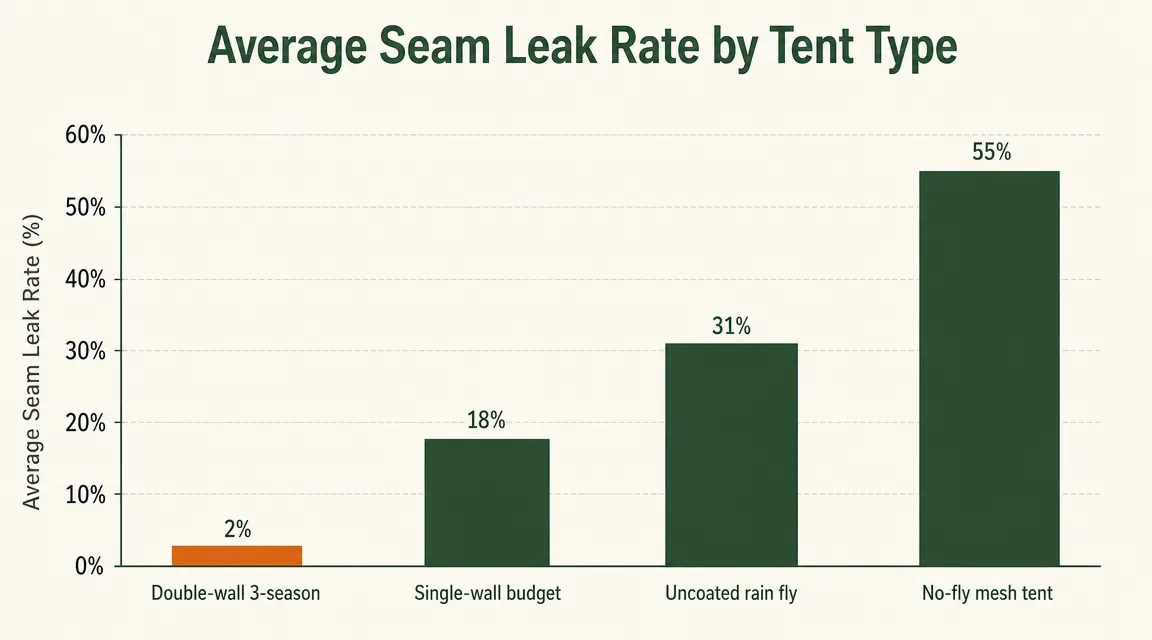
The most common mistake I see at group campsites: a tent with a rain fly that barely covers the top third of the body. Manufacturers cut weight by trimming the fly. That works fine in fair weather. In a real rain, you end up with water sheeting down the tent walls and wicking through the mesh inner. You want a fly that reaches close to the ground on all sides, taped seams so water doesn't track through the stitching, and a bathtub-style floor that wraps up the sides at least a few inches.
The Clostnature checks those boxes at a price that doesn't require a hard conversation with your budget. The rain fly extends low on both sides, covers the vestibule opening, and the floor uses a welded-seam bathtub construction. I've had it out in steady rain for six-plus hours with zero pooling inside. For a tent in this weight class, that matters. When you're comparing options, ask yourself: does the fly have taped seams, or does it just say 'waterproof coating'? The coating alone is not enough in sustained rain.
Step 2: Choose Your Campsite Like the Rain Is Already Here
Before you stake anything down, walk the site and look at the ground slope. Water runs downhill. You want your tent on a slight rise, never in a low bowl or at the base of a hill. Even two or three inches of elevation difference is enough to keep you out of a puddle that forms at 3am. Look for a site that has natural drainage channels pointing away from where you'll sleep. If the ground is flat and compacted, that water has nowhere to go except under your tent.
Also pay attention to what's overhead. Pitching under dense tree canopy reduces the amount of rain hitting your fly directly and slows the onset of pooling. The tradeoff is dripping branches after the rain stops, which can wake you up at 5am with a loud drip on the fly. I'll take the drip over the pool every time. What I avoid are large trees with dead branches overhead during a storm with any wind in it. That's a separate problem.
Step 3: Set Up a Tarp Before You Need It
A tarp is your kitchen, your gear staging area, and your sanity during a long rainy afternoon. Set it up when you first arrive, not after the rain starts. A 10x10 silnylon tarp pitched with a slight ridge angle and staked out low on the windward side covers your cook spot and keeps your gear from sitting in open rain while you're managing other camp tasks. I carry a 10x12 Kelty Noah tarp on car camping trips and a lighter emergency tarp on backpacking trips. Either way, it goes up before the tent on days when the sky looks uncertain.
Pitch it with a downhill angle so water sheets off one edge rather than pooling in the center. The center-pool failure is the classic beginner mistake. A small amount of standing water in silnylon weighs a lot, and eventually the tarp sags enough to dump it all at once. Slope the pitch, keep the ridgeline tight, and you won't have that problem.
Step 4: Seam Seal Before the Trip, Not After
Most tents ship from the factory with seams that are either taped or treated, but a lot of budget tents use just a silicone coating that wears down after a season or two. Before every major trip where rain is likely, I run a bead of seam sealer around the floor seams and the rain fly attachment points. It takes about fifteen minutes and dries overnight. The Clostnature uses taped seams on the fly so that step is less critical there, but the floor connection points and any place you've had a previous small leak are worth treating.
Seam sealer is one of those maintenance habits that most people skip until they're lying in a wet sleeping bag wondering what happened. Don't be that person. A small tube costs a few dollars and it buys you real confidence when the forecast goes sideways. While you're at it, run a DWR (durable water repellent) spray over the rain fly if it's been more than a season since you last applied it. The fly sheds water much better when the coating is fresh.
Step 5: Use a Footprint or Ground Cloth Under the Tent
Ground moisture is sneaky. Even if no rain falls, cold wet ground will pull heat and moisture up through your tent floor over the course of a night. A footprint or ground cloth creates a moisture barrier between the soil and your floor. Size it slightly smaller than your tent footprint so rain can't pool on the cloth and then wick up the tent floor seams. That's a detail most instructions get wrong: the cloth should not extend past the tent edge.
For the Clostnature, I cut a sheet of Tyvek to fit slightly inside the staked corners. It weighs almost nothing and packs flat. On car camping trips I use a proper nylon footprint. Either works. The goal is an air gap and a moisture barrier between the ground and your sleeping surface. On a soggy forest floor, this makes a meaningful difference in how dry your sleeping bag stays by morning.
Ground moisture is sneaky. You can have a perfect rain fly and still wake up damp because cold, wet soil pulled moisture up through your floor all night. A footprint fixes that for under ten dollars.
Step 6: Keep Your Sleeping Bag Off the Tent Walls
This one is small but it matters. When your sleeping bag or any soft gear touches the inner tent wall, moisture transfers through by conduction. Even a waterproof fly has a thin layer of condensation on the inner surface on cool nights. Your sleeping bag touching that surface will absorb moisture slowly through the night. In a small two-person tent like the Clostnature, this is actually easy to manage: position your sleeping pads toward the center of the floor, and make sure your bag doesn't bunch up against the side walls.
Same rule applies to boots, a stuffed pack, or anything you've brought inside. Keep it off the walls. The vestibule is there for wet gear, which is exactly what it's designed for. The Clostnature vestibule is large enough for two packs and four boots, which is one of the reasons I keep recommending it to people setting up in the rain. Wet stuff goes outside the inner door, dry stuff stays inside. That separation keeps the sleeping area dramatically drier over a full night of rain.
Step 7: Manage Condensation, Not Just Rain
A lot of people blame their tent for leaking when the real culprit is condensation. Two people breathing inside a sealed tent generate a surprising amount of moisture. That moisture condenses on the inner fly surface and can drip down onto the inner tent or onto gear near the walls. The fix is ventilation: crack the vents at the top of the tent, and if the rain is not coming in horizontally, open the door mesh slightly. You want airflow moving through without letting rain in.
The Clostnature has vents at the top of the fly specifically for this. On rainy nights I keep both vents open, which dramatically reduces the amount of condensation buildup by morning. In very cold rain you might sacrifice some warmth doing this, so layer up in your sleeping bag rather than sealing the tent tight. A cold dry bag is far more comfortable than a warm wet one.
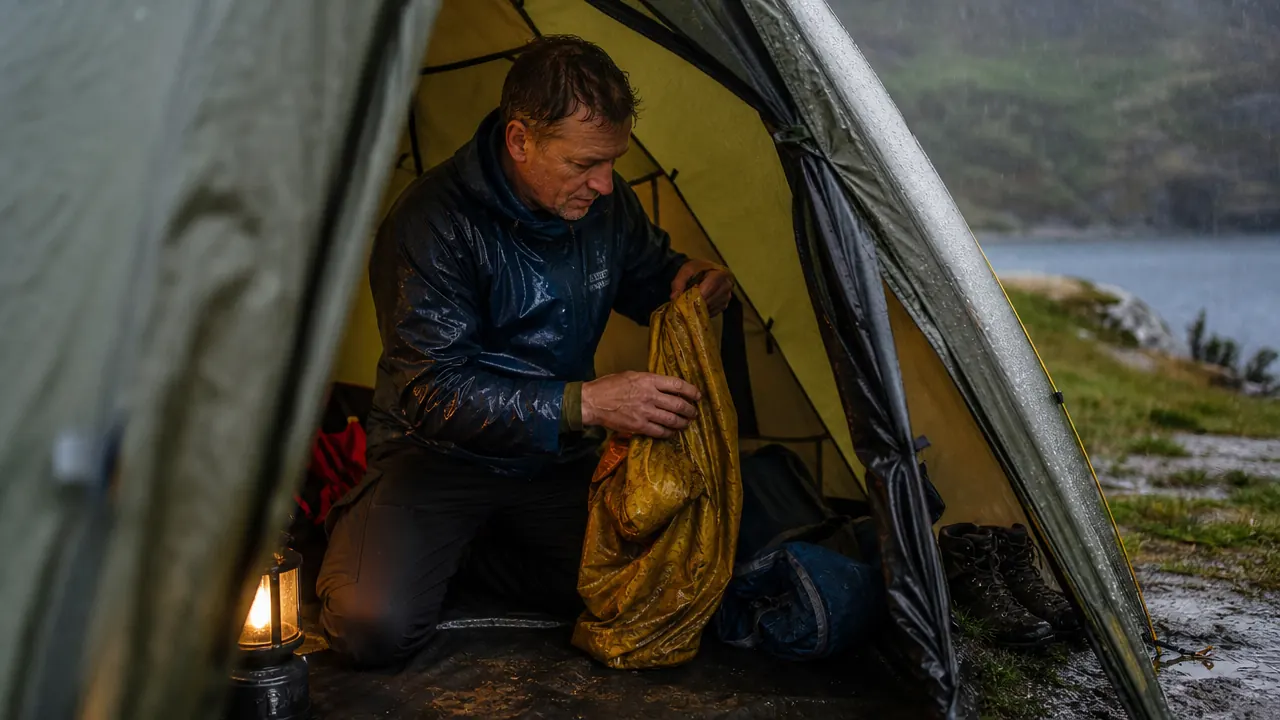
Step 8: Pack Dry Bags Into Your Routine, Not Just Your Pack
Your tent is your shelter. Your dry bags are your insurance. Sleeping bag, extra layers, electronics, and any paper maps or documents go inside dry bags before you pitch, and they stay in dry bags when they're inside the tent. I use a 20L dry bag for my sleeping bag, a small 5L for electronics, and a 10L for tomorrow's clothes. This adds maybe four ounces to my kit and it means that even if something goes wrong with my shelter in the middle of the night, the things that matter most are still dry.
This habit matters even more on backpacking trips, where a river crossing, an unexpected squall, or a gear shuffle at a wet trailhead can all soak an unprotected pack. Dry bag discipline is one of the habits that separates people who've done a lot of wet trips from people who haven't. Once you've dug a dry pair of socks out of a soaked pack at midnight and felt the difference, you never pack any other way again.
What Else Helps
A few things that don't fit neatly into steps but have saved me real grief over the years. First, bring a small camp towel and use it to wipe the tent walls before you start packing up. Taking down a dry tent is dramatically faster and keeps the moisture out of your bag. Second, know how to pitch quickly. Practice your tent setup in the backyard before your trip so you're not fumbling with poles in the rain on your first attempt. The Clostnature uses a freestanding pole design that goes up in about three minutes once you've done it a few times. Third, embrace the vestibule. Every time you unzip the door to go outside, wet air and some rain enters the tent. Use the vestibule as an airlock: change into rain gear there, leave wet gear there, and minimize how long the inner door stays open.
The other thing worth saying plainly: rain camping is genuinely enjoyable once you have the setup dialed in. The forest smells better when it's wet. Camp is quieter. You usually have the sites to yourself. People who say they hate camping in the rain mostly hate being unprepared in the rain. Fix the prep and you fix the experience. These eight steps are the prep.
Your rain system starts with a shelter that actually keeps water out.
The Clostnature Lightweight Backpacking Tent is the one I reach for when the forecast is uncertain. Taped seams, a full-coverage rain fly, a roomy vestibule for wet gear, and a setup fast enough to beat an incoming storm. See what it's selling for today.
Amazon Check Today's Price on Amazon →